1. 情景
在使用脱壳机对Android App脱壳的时候,我们常常会得到有nop指令填充的函数的dex,nop是No Operation的缩写,意为无操作。
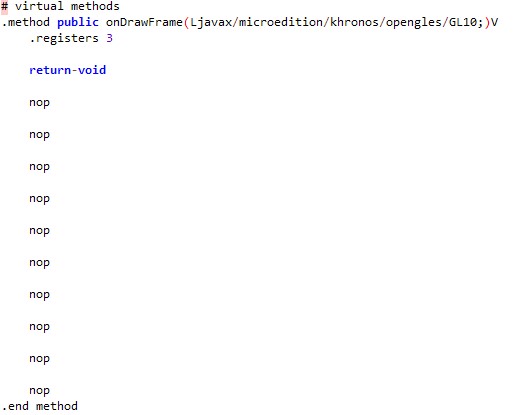
上面是一个函数的smali代码,可以清晰的看到函数被多个nop指令填充,如果这个函数解析成Java代码,则得到一个空的函数:

某些壳在加固的时候会把dex文件中的函数的真正函数体给抽掉,用nop指令来填充,nop指令在这个过程中只用作占位,当函数执行的时候再把真正的代码给还原回去,加固壳用这种方式来保护函数中真正的代码。我们修复的过程就是把函数的真正代码写回dex文件的过程。函数修复后:

2. 修复
FART在dump dex的同时,还把dex的CodeItem给dump了下来,这给我们修复dex提供了极大的便利,CodeItem中存着函数中真正代码,CodeItem dump下来后存在.bin文件中。所以我们修复的时候,读取.bin文件,把CodeItem填入Dex文件的相应的位置即可。
我们打开.bin文件,可以看到它由多项形如以下格式的文本组成,每一项代表一个函数
1
| {name:void junit.textui.ResultPrinter.printFailures(junit.framework.TestResult),method_idx:1565,offset:52440,code_item_len:46,ins:BQACAAQAAADpYAIADwAAAG4QpwUEAAwAbhCmBQQACgEbAhYFAABuQBsGAyEOAA==};
|
我们来看这些数据都是什么:
name 指示函数的全名,包括完整的参数类型和返回值类型method_idx 是函数在method_ids中的索引offset 指示函数的insns相对于dex文件的偏移code_item_len CodeItem的长度ins base64字符串,解码后是dex结构中的insns,即函数的真正的代码
在dex修复过程中,对我们有用的是offset和ins,可以编写代码将它们从.bin文件中提取出来:
1
2
3
4
5
6
7
8
9
10
11
12
13
14
15
16
| public static List<CodeItem> convertToCodeItems(byte[] bytes){
String input = new String(bytes);
List<CodeItem> codeItems = new ArrayList<>();
Pattern pattern = Pattern.compile("\\{name:(.+?),method_idx:(\\d+),offset:(\\d+),code_item_len:(\\d+),ins:(.+?)\\}");
Matcher matcher = pattern.matcher(input);
while(matcher.find()){
int offset = Integer.parseInt(matcher.group(3));
String insBase64 = matcher.group(5);
byte[] ins = Base64.getDecoder().decode(insBase64);
CodeItem codeItem = new CodeItem(offset,ins);
codeItems.add(codeItem);
}
return codeItems;
}
|
CodeItem类:
1
2
3
4
5
6
7
8
9
10
11
12
13
14
15
16
17
18
19
20
21
22
23
24
25
26
27
28
29
30
31
32
33
| public class CodeItem{
public CodeItem(long offset, byte[] byteCode) {
this.offset = offset;
this.byteCode = byteCode;
}
public long getOffset() {
return offset;
}
public void setOffset(long offset) {
this.offset = offset;
}
public byte[] getByteCode() {
return byteCode;
}
public void setByteCode(byte[] byteCode) {
this.byteCode = byteCode;
}
@Override
public String toString() {
return "CodeItem{" +
"offset=" + offset +
", byteCode=" + Arrays.toString(byteCode) +
'}';
}
private long offset;
private byte[] byteCode;
}
|
接着将需要的修复dex复制一份,把insns填充到被复制出来的dex的相应位置,即修复过程:
1
2
3
4
5
6
7
8
9
10
11
12
13
14
15
16
17
18
19
20
21
| public static void repair(String dexFile, List<CodeItem> codeItems){
RandomAccessFile randomAccessFile = null;
String outFile = dexFile.endsWith(".dex") ? dexFile.replaceAll("\\.dex","_repair.dex") : dexFile + "_repair.dex";
byte[] dexData = IoUtils.readFile(dexFile);
IoUtils.writeFile(outFile,dexData);
try{
randomAccessFile = new RandomAccessFile(outFile,"rw");
for(int i = 0 ; i < codeItems.size();i++){
CodeItem codeItem = codeItems.get(i);
randomAccessFile.seek(codeItem.getOffset());
randomAccessFile.write(codeItem.getByteCode());
}
}
catch (Exception e){
e.printStackTrace();
}
finally {
IoUtils.close(randomAccessFile);
}
}
|
是不是很简单,本文完。
3. 完整代码
https://github.com/luoyesiqiu/DexRepair